Monday, April 27, 2015

Pi Cluster Week 2, Session 2: The Work is Done

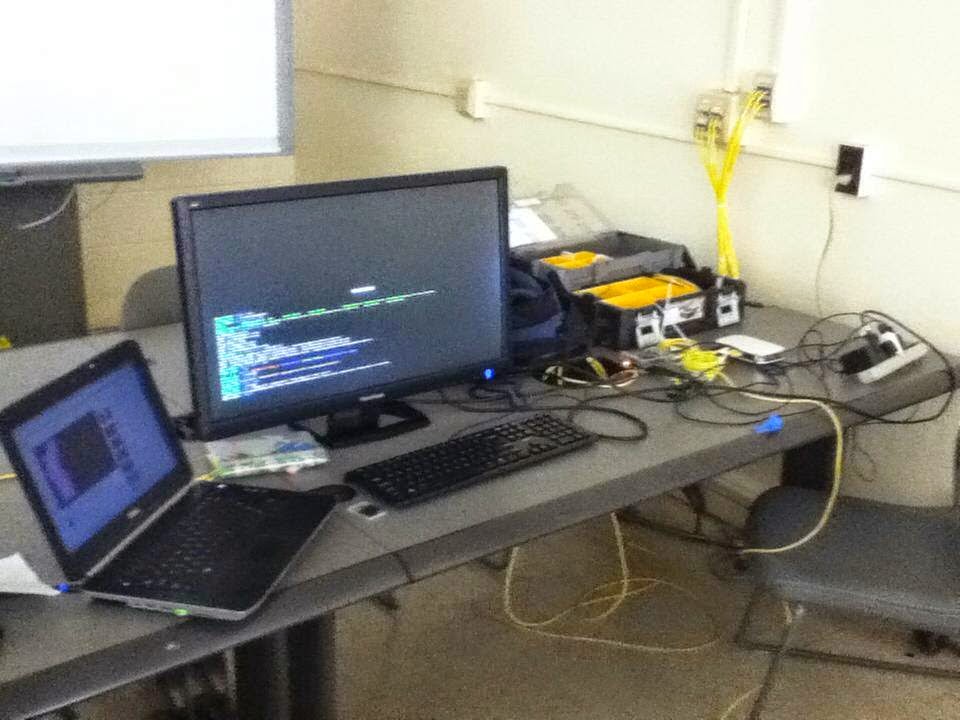
As of today, the Pi Cluster has been completed! I successfully ran the wordcount example across three nodes. Here's the messy setup the work was done with:


The laptop of course is playing Here Come the Mummies.

I'll be demonstrating the cluster in action counting word occurrences in the Iliad Wednesday at 1pm in this same classroom. I'll be showing up a bit early (maybe an hour or two) to make sure everything is configured. I also completed a full report on building the cluster, which I will share in a separate post

One quick piece of advice for this project is that I'd certainly recommend keeping everything in a toolbox like the one pictured. When you get more and more nodes, you'll need it. My toolbox certainly served me well for the four node model, and if I used smaller cables and strips, I could certainly see it helping me far beyond that. Here's a picture of how I kept everything stored:


Tuesday, April 21, 2015

Pi Cluster Week 2, Session 1: Passing around the Pi

Today was a day of working out the logistics of incorporating multiple raspberry pis.
This meant not only prepping the additional hardware, but also preparing the SD cards with the appropriate operating system. I thought that this would mean getting a clean Raspbian download, when in fact what needed to be done was to clone the master's OS. I did this using a handy tool called Win32DiskImager on my windows side. 


Sadly this took a lot of class time, so I made sure to put some time aside for a small session in the lab to catch up. 

After I had the images up and running I made it an a point to bring the hardware together, and attempt to get everyone (the pi's) talking to each other, even if it wasn't in the most official of manners. After having a box of project props to deal with for the past few weeks, I finally came up with this configuration:


With my Pi acting as Node1, the master node, and then the CS department's older B+ acting as its slave. This is where the static IPs come into play, in that you pretty much create any class of network you'd like, so long as all of the Pi's know about each other. At this point the cluster is now it's own thing, away from the internet. I managed to get everyone able to ping each other and even ssh.


However I noticed that my tutorial seem to emphasize just including the hostnames as the basis of connection, so when I began to run the hadoop scripts, they were still unable to communicate. I thought it would be best to try to connect using names in the style of hduser@10.40.X.X (for specific users on each node), but that didn't seem ideal for dynamically adding and removing lots of nodes. I then looked up connecting to the hostnames, and saw that I'd need to either set up a DNS server to resolve the hostnames to IPs (Man, so networking!), or kind of fudge a DNS server by telling each pi that name X is equivalent to IP Y, or at least letting the master know. If the former (each Pi), than I perhaps should have done this before creating the image, but thankfully because I have a low number of nodes, it won't be that much of a big deal.

I figured that this would be a good place to stop, and (seemingly) one of my last roadblocks in getting distributed programs running. Thursday I will hopefully run my first distributed program, and maybe even attach a third node! At this point we'll conclude, and talk about how to expand this project, and optimize it the next time it's implemented. Already I've encountered a few ways to make this process simpler, and run more efficiently. Moving forward, I drafted this for a layout of the primitive cluster:


Wednesday, April 15, 2015

Overview: Electric Mortar Board

In case you haven't heard, I'm graduating soon in Computer Science and Applied Science & Mathematics. That of course means a graduation ceremony, which means the supreme irony of wearing an absolutely silly costume to celebrate an academic achievement.

I'm sure you're aware of the tradition of modifying your mortar board, usually with some kind of decoration or writing along the top. I've decided to get creative and use some electronics to make one sassy futuristic get up. I'll be making two primary modifications, namely the addition of neopixel led's around the sides and top, and a feather tassel instead of a boring ol' regular one. Here are some of the supplies I'm going to use to make the lights a reality:
  • Flora microcontroller
  • Neopixel LEDs
  • A potentiometer or switch
  • a small power supply
  • some things I'll forget to mention
Today, I should have one meter of neopixel in hand. I'm going to try my best to get it tested with the flora as quickly as possible so I can began more intricate procedure like writing my own sequences and changes. The last and dreadful step will be applying everything to the cap. Thankfully I also have my girlfriend's to work with if I mess anything up.

The flora's power options leave a little to be desired in terms of pinout and max voltage, meaning I may have to purchase a proper battery for it, but I believe I can shape a battery pack out of some RC supplies I have.

I'll stay updated on twitter, youtube and here on the project. :)

Thursday, April 2, 2015

Prolog Enigma Machine FINALE

It has arrived!


The plugboard turned out to be a pretty easy addition, so I went ahead and cleaned up the code and submitted it to Github.  One version is completely condensened and lacks comments for your convenience. Feel free to fork me, adding new models or visualizations.

Prolog Enigma Machine Week 3: Finishing Touches

Prolog says Yes.

As you may have noticed on my twitter, my M3 Enigma Machine is really coming together! This is the product of a lot of refining of the primary enigma predicate, which consists of all of transitions from rotor to rotor. While this model is static, I feel that this code could easily be adapted to fit the different rotors. While you're at it, you should also make me a GUI like the amazing one I used for reference. (:

In terms of completeness though, I'm currently ready for the presentation, but I still need to add the plugboard. The good news is, that compared to the rotors, this is an easy task... especially considering I already wrote the predicate! It takes in the original alphabet, a list of pairs, and returns an exchanged alphabet, like this:


alphabet(A),
plugGen(A,[[a,c],[b,f]]).

Would yield

A=[a,b,c,d,e,f]
O=[c,f,a,d,e,b]
 
As it turns out, the professor is giving us another week to work on this so I'm going to take it easy, and just get that plugboard implemented that day. For now enjoy pics of success IO that you can replicate yourself in any other emulator!


Pi Cluster Week 1: Doopliss, A hadoop-based Raspberry Pi cluster

Conveniently, just as the Prolog Enigma Machine project is coming to a close in Programming Languages, my Networking professor has set up a project for his course! I consider myself a total chump in the realm of OSI model beyond IP, so as opposed to going for something application layer-y (such as expanding my PHP-based site), I chose to turn back the clock and choose an application that doesn't even require the www, except for downloading packages and the like: A Raspberry Pi "Supercomputer" built from several raspberry pis.

This is very much an "exploratory" expedition in that I'm handling a lot of new ground here, including networking with the Raspberry Pi, configuring and running Hadoop programs, and networking multiple raspberry pis. My hopeful end goal is to be at a point when the cluster becomes "expandable" in that I can readily add nodes with ease.

Today we had time in class in work on the projects, so my first objective was to get to a point where I could ssh into my Pi, so I wouldn't have to use the only (gigantic) HD monitor, which was drawing the attention of my classmates. -_-;

Tutorial: SSH connection to Raspberry Pi

(The following instructions are between Ubuntu 12.04 on ethernet and Pi on ethernet)

 This was as easy as adding to 

/etc/network/interfaces

a few lines specifying an IP you'd like to use.
But first, you'll want to check the network your Linux machine is using by entering

ifconfig

and paying attention to the inet address.


Now, in the interfaces file, add a few lines to specify an IP from the same network.  Using the read above as example let's do this:

iface eth0 inet static
address 10.40.48.75
netmask 255.255.255.0
gateway 10.40.48.1


It's important you keep the netmask as is (or rather that it matches the PC), but you'll need to change the address to one of your preference. I chose 75. The gateway needs to be the address of your router, which will be the first valid IP in the network. If you're unfamiliar with these words, I encourage you to learn more about this kind of networking (particularly IPs), as it may prove useful to you in other applications.


next, make sure you enable ssh from

sudo rasp-config

under advanced options. At this point you can go ahead and reboot using the command

sudo shutdown -r now

 The most annoying part about configuring a raspberry Pi is that you'll find yourself rebooting... a lot. So make sure to find a proper diversion. Once we successfully ssh we can distract ourselves with the other crap on our PC.

With the Pi rebooted, enter

hostname -I

to verify that the Pi is using the IP you asked for. If your IP you entered was taken, you'll like be assigned another one... I found that I was attempting to use another student's in the classroom, so it gave me a slightly different one.

Now, on the PC, use the command

ssh pi@<IP_Address>

inserting in the IP address of the Raspberry Pi. You should be asked some yes/nos and the password of your Pi, but then you'll be in. You may now stow your monitor for most/all intents and purposes.

Configuring the first node for the cluster

From here I'll speak more generally about I did the rest of the class, which was configuring my Raspberry Pi as the first node of a Hadoop Cluster. In few words, Hadoop is software for running distributed java programs. I followed this great tutorial up to running my first Hadoop program, which was counting the words in the license file. Quite a bit more interesting than your average HelloWorld!


During this time I had to add a new user to the pi for interfacing with Hadoop, at which point I figured it was time to give the project a name of sorts. I decided to go with Doopliss, to follow that convention of taking one syllable from the software and then adding something useless at the end. It also happens to be one of the many charming characters from Paper Mario: The Thousand Year Door, a particularly annoying one, who steals Mario's identity, and refuses to give it back unless Mario can spell his name.

 My least favorite chapter, but one of my favorite boss themes.

An annoying character for what I imagine will evolve into an annoying project! I say that, but I am really interested in the potential of stacking several multi-core processors to analyze large datasets. Next week will be about working with hardware to add more physical nodes. I currently have three Pis in my possession, two of which belong to the school. I'm happy to say that I was able to run a program on my own (single node) supercomputer today, though!

All in two hours!
Well, this is embarassing...

You can take pictures just of the active window?!?!