Thursday, December 24, 2015

Steam Link first impressions

My girlfriend made the bold decision of getting me what's currently considered a bit of a "controversial" device-- the Steam Link. While I had more or less directly asked for one, or at least hinted at it with my Amazon wish list in the weeks prior, I'd be lying if I said I wasn't a little nervous about the prospect, especially after watching Super Bunnyhop's very thorough review.


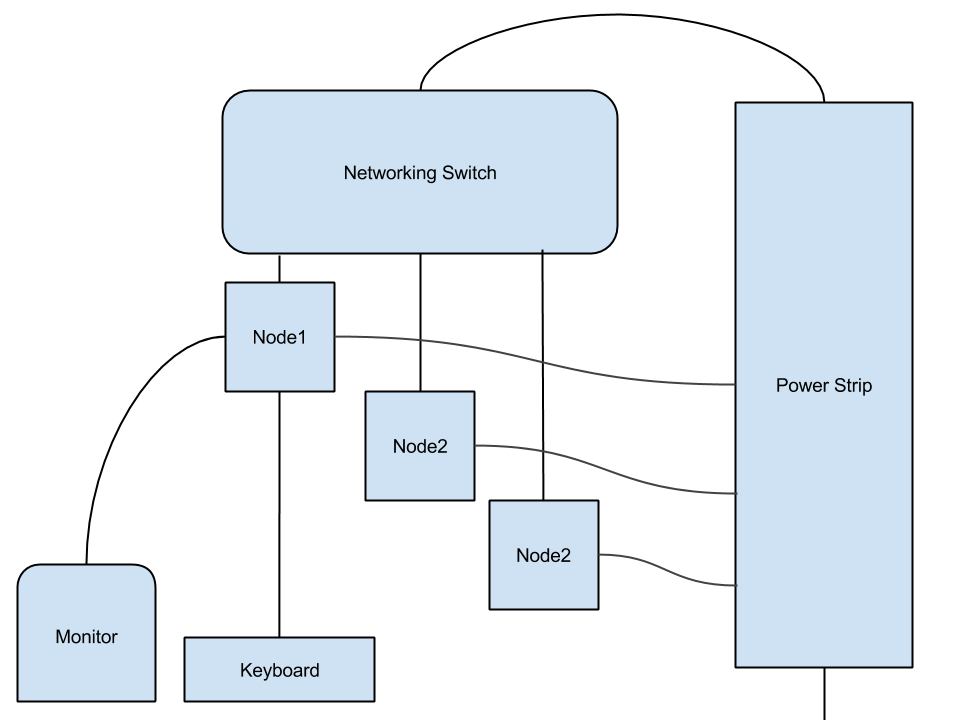
Thankfully though, upon initial setup I'm happy to report that I didn't experience any of the potential hurdles. As a seasoned technologist (or whatever you would call me), I'm very wary of the term "Plug'n'play", knowing fully that anything can go wrong. This was evidenced by the fact that I laughed aloud at the idea of the steam link's "quick start" manual that is literally two images of how everything connects, and a link to link.steampowered.com. Keep in mind that I've never once used "Big Picture Mode", or streamed from any device onto another. Surprisingly though, despite my expectations, within 10 minutes, I was easily playing Metal Gear Rising on my downstairs TV with no lag to report of... What is this wizardry?

It's possible that I faced little impedance because I had the tools for the job-- the recommend wired Xbox 360 controller and a handy wireless touch keyboard that I keep around for my Raspberry Pi projects. I'd particularly recommend scoring a wireless touch keyboard because it allows you to have a mouse and keyboard for interfacing at the cost of only a single USB port. Though I must say, for my experience of playing Rising, Rogue Legacy and then buying two games on sale, I only used it to move my mouse icon out of the way from the screen on Rising (an in-game problem, no fault on the device), and to more conveniently enter my credit card information.

Bunnyhop's review gave me the impression that knowing what games were "out of the box" compatible with the Steam Link would be a gamble each time. However, I can thankfully report that's not the case. The UI has this great system for every game you select that shows the controller type and then a check or arrow depending on whether the game is installed. Most importantly, the UI will only display the controller icon if the game can play with the controller natively, i.e. no configuration needed. For example, Rising and Rogue Legacy show the controller icon, whereas a game that can be configured with a controller just shows a keyboard by default. Some may not care for this non-inclusiveness, but after busting my skull trying to get controllers working for games that brag some kind of controller support (Dead Rising 2), it's nice to know that you're entering at your own risk. In fact, I wish my PC version of steam did this by default!

That being said I've not yet to experiment playing with games that require any configuration, or play with any emulators. I will report back with those inevitable frustrations.

Even when purchasing games via the Link, it was kind enough to inform me that I was purchasing a game that was intended for keyboard and mouse. I feel like this information was contained in Bunnyhop's great review, but it's really something you may not notice until you experience it for yourself-- and it made a big difference for me.

When interfacing menus with the controller, there's a surprising amount of easy to access features, whether you're just navigating within your library/store or from in-game. Particularly appealing to me is the dichotomy of "My Game" for each title, which contains all of the personal stuff, like screenshots, and then below that all of the other community resources. I've not tried chatting or web browsing, but the option is there!

Now, regarding graphic quality. I'm really glad I chose to play Rising first, as I can't think of a game in my library that would be more of a struggle to stream onto a downstairs TV than this one. However, I was immediately impressed by the quality. Much like how the pre-rendered cutscenes in Rising look like real gameplay (in my humble opinion), so does the stream on your TV match the real thing! I think we all know what the artifacts of streaming look and feel like, and while I'm fairly naive in the streaming circuit, I definitely feel like you could fool me with this one! That's so far, but I definitely feel like Rising and Rogue Legacy were good litmus tests for being such different games. I'll continue to update with my findings and frustrations, but for now I'm very satisfied and would highly recommend the steam link to anyone that wants to share some of their PC love downstairs on the couch.


Sunday, December 20, 2015

Developing Neural Network architectures

I've been putting a lot of my outside efforts into studying neural networks. After following along with David Miller's great vimeo tutorial to produce my first neural network in C++, I've began reading primers not only on how neural networks are constructed, and what types of neural networks best fit certain problems. I've been through a few resources, but my best recommendation would be Neural Network Design by Martin Hagan et al. I recommend following along with the book slowly and digest each new piece of information slowly, and, instead of looking at the available files, create your own working examples. You'll see on my github that I've done just that, using Octave. It was my initial intention to follow along in Racket/LISP, but it quickly became a detriment trying to force lists of lists to behave like matrices, especially for the finer things like transposing matrices. I know there's an available library, but it falls back on "arrays", and it all just feels very un-lisp-like! Eventually I will meet this goal. However, for now, check out my github for updates on the ANN stuff I've developing. I'll try to get some solid documentation available so you can just clone and go.

Saturday, December 12, 2015

CSS Parser v0.1

This morning, after putting in some extra hours I got the first iteration of my CSS parser working. Originally I had made seven example selectors that manually placed into my cssSheet API to test out how my "trees of selectors" would work out.  After thoroughly debugging these methods, I went ahead and spent some hours on how the parser's actions behaves. Originally I thought I was in hot water because I would only be passing around one selector, but thanks to the way the grammar behaves, it actually worked, and parsed a test css sheet that contained these same examples! It was very exciting.

Also the fact that this worked with multiple selectors floating around within the grammar gives me hope for implementing things like the wildcard selector and giving multiple selectors the same set of properties in one declaration. Honestly, because ANTLR and grammars are so powerful, these things could possibly work already-- but that's providing my code plays nice. Anyways, the next step will be implementing the parser into the engine, and then I imagine I'll be maintaining it both through our enhancement and in the future. But I don't mind. I think ANTLR is cool, and I like working with it. I really felt the pressure from the deadlines I've been working under, but I'd like to make parsers a regular part of my programming diet. There's this magical moment where you're mentally considering only so many cases, and your completed parser readily handles so many more. It makes you want to attribute some intelligence to the design that isn't there at all-- it's just a beautiful structure.

Sorry for being sappy.

Adding Actions To Your ANTLR Grammar

We established last time that getting antlr to generate code is a huge pain. Even worse, is the fact that it's hard to find good examples of the antlr workflow, i.e. generating code with actions, adding arguments, and etc. Thankfully, in my quest to build a CSS parser in C++, I've managed to track down two invaluable Stack Overflow posts that proved invaluable.
The first is a simple ANTLR3 example. I found this to be a very helpful workflow example for antlr3. While it's aimed towards a Java target, it should be very simple to translate the code actions to any other language. While working on this example I also highly recommend learning what ANTLRWorks has to offer, especially the syntax diagrams and built-in interpreter. These tools should help you better understand your grammar, including what it can handle and what it can't. It's also not a bad idea to follow along in a debugger when running the parsing routine to get a hold of how the grammar actions behave. If you find any tweaks that need to be made, just remember to apply them to the grammar, or they will be wiped away if you ever generate your parser again.

By the end of that example you should have built it all; a Exp parser and lexer from ANTLR3, and added target code to the grammar that works. At this point you should be ready to work with a larger and more sophisticated grammar. However, you may find using the limited rules in the Exp example that you can't accomplish everything you'd like with only returns. Thankfully this other post shows how to pass in arguments.

There are a couple of other things to consider as you fiddle with your grammar. Code actions must go under a rule. Also, don't expect ANTLRworks to know what the hell your code is supposed to. Its job is to understand your grammar. This is both a blessing and a curse. It's a blessing in that you don't really have to show ANTLR the classes and structs you're working with, but at the same time, you can sabotage yourself and write some funked up code-- but your IDE will let you know.


Friday, December 4, 2015

Arduino or Raspberry Pi?

In 2016 I will be instructing some courses at the Kre8now Makerspace in Lexington, introducing people to the Arduino and Raspberry Pi microcontrollers. While I would certainly recommend taking both courses for the full picture, the reality is that you have a project in mind, and would like to decide whether to realize it with the Arduino, or with the Raspberry Pi. The problem is, how do you know which one to use without experience with both?

A lot of different online resources seem to have different measures to help you choose which one to use. Make Magazine, for example endeavors to number the amount of tasks for the project, and if

I personally think that a lot of the measures are bit far-fetched, so the natural thing to do is to add my own far-fetched measures of which board to use. And here's the first:


1) Consider your ports.

Now if you don't have much computer/AV know-how, that may have been a confusing bit of advice, but what I mean to is to carefully consider the inputs and outputs of each board-- they tell you a surprisingly amount about its capabilities and the simplicity in carrying out those capabilities. To make this more apparent, let's consider the ports on both devices:


Raspberry-Pi
  • HDMI output
  • direct 1/4 inch audio jack
  • ~4 USB ports
  • Camera port/display port
  • Ethernet port
  • micro-SD slot
  • ~40 GPIO pins


Arduino
  • ~10 digital I/O pins
  • ~5 Analog input pins


Right now this may sound like a commercial for the Raspberry-Pi, but I assure you it's not!

Sure, the Raspberry Pi has more options, but that's because it's a full-fledged computing system and needs these services! The Raspberry pi runs a version of Linux which is very similar to any desktop/laptop version-- you can install the same programs and more from the same set of commands.

So why not just choose the Raspberry Pi for every project? Well, for applications that are primary electrical and autonomous (self-controlled) I'd choose the Arduino nearly every time, because it is far more idiot-proof when it comes to electricity, and far more flexible. Without going into too much detail, the Arduino is far more foolproof to higher voltages, whereas if you give the RPi anything beyond it's recommend 5v... expect your RPi project to be placed on hold.  Also, the Arduino very simply handles analog input/output, whereas you must "trick" the Raspberry-Pi into doing analog signals, by either simulating them or buying additional equipment. Even when working on Raspberry Pi I often "sketch out" my designs in the Arduino because it's so easy to work with!


My second and last comparison would be this:

2) Appliance vs. Computer System

When I say appliance, you probably have some clear pictures in your mind: A toaster, a refrigerator, and even smaller appliances like a blow dryer, a cat feeder,  or an alarm clock. Whereas with computing systems, more complicated systems should come to mind: video game consoles, robotic systems, and anything with the prefix "smart". From what I've already described you should be able to see more clearly why the two boards paint these distinctions. The Pi allows for easier networking, processing and display, whereas the Arduino is a simple wizard of electricity.

As a last measure of helping you decide, here's a pool of 5 projects each that best suit one board over the other, along with some helpful links!

Arduino:
Guitar Pedal, Small and simple autonomous robot, door-lock system, Plant waterer, motion alarm

Raspberry-Pi:
Media Center, Retro game emulator, Multi-core cluster, security camera,
internet radio

However, if you're dead-set on accomplishing a project with a board in mind, I encourage you to do so! There's truly only a few impossibilities that prevent you from crossing the streams, and often times doing so leads to new discoveries for you about your project and your board. Give it a try!

If you're interested in finding out more about Arduino and Raspberry-Pi projects, I recommend checking out instructables, and the two boards' subreddits. It also doesn't hurt to check out selections at shop sites to see what they offer. Adafruit in particular often has tutorials for both boards.

Thursday, December 3, 2015

ANTLR quickstart

He's a resource I wrote for those of you wanted to get started with ANTLR, but cut through the BS red tape and get straight to writing grammars! Here it is:

I spent a lot of time trying to get ANTLR in usable shape, and I found the documentation dreadful. So allow me to lay out a much easier alternative to using ANTLR right out of the box, that doesn't require finnicking with system variables that never work.

This may not be the most "flexible" route, but is certainly the quickest one in my experience. The instructions are usable in both UNIX and Windows.


  1. Download the java jdk.After you have it installed you *should* be able to invoke the "java" command from your command prompt. test it using "java -version". If you get some kind of output from that, then great!
  2. Download the ANTLR complete jar.There are two antlr sites in an attempt to separate ANTLR3 from ANTLR4.
    If you want ANTLR4, go to antlr.org
    If you want ANTLR3, go to antlr3.org
    In either case, download the complete jar to a location you wouldn't mind using it.
  3. Test installationIn your command prompt move to the directory that contains the complete jar.
    try the command

    java -cp antlr-x.y.z-complete.jar org.antlr.Tool

    in ANTLR3, or in ANTLR4,

    java -cp antlr-x.y.z-complete.jar org.antlr.v4.Tool

    This command should work, and return options for ANTLR.
    The cp argument means you can you specify CLASSPATH within the command, removing
    the additional step of fooling around with system variables.

  4. Test output
    Use the included "Exp.g" grammar taken from a stackoverflow question and run the following command in ANTLR3

    java -cp antlr-x.y.z-complete.jar org.antlr.Tool Exp.g

    or in ANTLR4

    java -cp antlr-x.y.z-complete.jar org.antlr.v4.Tool Exp.g

    If you're using your own grammar, make sure that the filename matches the first line, e.g. grammar css = css.g

  5. Test different target.In your grammar, add the line

    options{language = C;}

    where "C" is whatever target language you'd want. I'm typically concerned with C or C++
    output, so I use "C" or "Cpp", though ANTLR4 doesn't target C or CPP.
    Run the same command again, and check that it ran correctly and output matches the desired filetype.

  6. Design your grammar
    Congratulations. If the step before worked, than you have everything you need to start doing *actual work* with ANTLR! I hope this was helpful in getting you started, and not hung up on installing stuff. 

Edit:
I found myself also need to check out antlrworks to see how my grammar is structured. As of 1.5.2, try

java -jar antlrworks-1.5.2-complete.jar org.antlr.Tool <grammar.g>


"Installing things is the hardest part of programming."

Monday, November 30, 2015

Code for WRT-T1 added on Github!

Hey everyone,

the source code for the WRT-T1, along with two tests I used during development are now available on my Github.

Sunday, November 22, 2015

"Artificial Intelligence: The Very Idea" by John Haugeland

I'm not a philosopher, but I'd like to think of myself as a deep thinker when it comes to the topics I love like robotics, computing and artificial intelligence. I've wanted to read more literature about these topics in my free time, so I started by going through my backlog of books I picked up from half-price books. One of them was a used copy of John Haugeland's "Artificial Intelligence: The Very Idea". As I may have hinted, this is a far more philosophic book that I'm used to reading, but I highly recommend it whether you're a student of computer science or of philosophy. While I was familiar with many of the computer science topics (like Turing's work and computer architecture), many of the philosophic approaches to AI problems were really refreshing and exciting. Some would complain that the book is a little dated (published in 85), but I would argue that the concepts are just as relevant today. To dismiss the idea that AI could afford to more closely resemble some of the finer parts of the human consciousness would be very short-sighted, so even if the idea seems silly the book is far too informative to dismiss without at least hearing how AI could stand to benefit from some of these features, and what they mean to our understanding of intelligence. On that topic, the book is equally interesting as an exploration of what makes human intelligence. You'll leave with an appreciation for a lot the innate "talents" the human brain can accomplish, and wondering if they can translated as automatic formal systems. 5/5

http://www.amazon.com/Artificial-Intelligence-The-Very-Idea/dp/0262580950

Tuesday, November 17, 2015

WRT-T1: Wireless Raspberry Pi Tank

After several bouts with circuits, CMake, and the Raspberry Pi's weak PWM game, I've finally finished my first revision of my wireless Raspberry Pi tank, my first first, albeit boring solo venture into teleoperated robotics. :)


The first challenge was framing the input and output. I chose to make the input a wii remote intitially because I wanted to use a game controller, but a simple one. When I was younger and the wii was still a new console, I remember being amazed at a college kid who powered most of his dorm through the wii remote, so learning wii remote input has always been a desire of mine. Not to mention the unit is compact, wireless, and has many different peripherals. I went with this library called WiiC, which functioned quite nicely. As you can see from the demonstration below, I paired wiimote input with LEDs on the Rasberry Pi's GPIO using WiringPi:


Next came working with the motor output. I chose to build my own motor driver circuit (for some reason) built off of a h-bridge IC. I first prototyped a version on a breadboard and tested it with the Arduino Uno. Then, I got out my soldering iron and built it onto soldered micro breadboard from Sparkfun. Below you can see the fritzing diagram, and how it interfaces on the Raspberry Pi. Each motor has two logic pins and a speed pin. I also have a second LED to act as a signifier that the wiimote is connected.


The last part was writing and testing a state machine for driving the motors. I could have conceded to doing all digital tank controls wherein you can only drive OR turn, but I simply had to have some more natural turning, so I then began fussing with using PWM (pulse-width modulation) on Raspberry Pi. As it turns out, the Pi only has one native PWM, so in order to go beyond that, you need to force wiringPi to create a "simulated" PWM using the processor's clock, which is a bit of a pain. Thankfully I managed to get it working though. As it stands I still need to back off the wheel that's being turned around.

The last steps that remained where changing the raspbian OS to boot that program on startup, with log-in and use an external power source. I decided to use one of the USB charging sticks that I got from an underwhelming career fair I attended in college that made me depressed. But hey, now it powers my sick robot!

Anyways, I have plans to return to this project and apply a number of upgrades, including camera and networking controls, and some kind of armament.


Thursday, November 12, 2015

November Update


Does Jacob still do stuff?


Why yes! I sure do. It's not all once, and it's not always to completion, but I sure do things! I was thinking deeply today about things like spoilers, datamining, and reveals. I was wondering if I should adopt a sort of "showroom floor" attitude towards my accomplishments and only post them on completion, but I feel that undermines all the work that goes on beforehand! There's already so many people suffering from technological illiteracy that feel like things just come into being after someone has an idea, but really there is and always will be a lot of hard work between those two points. And I feel it's time that I reveled in that time a bit more. I feel like there's a lot of pressure around to get in, get working, and get done, but the truth is this is what I do and I love it! So what if I take a break? I'm still contributing to a wide-base of knowledge I can pick back up at any point. That's how the brain works, and I love it!

That being said, I figured I would make a few posts about the various things I've been working on. None of them are quite at the level of the showroom floor, but that's not all there is to tech! I've been reading a fascinating book, learning to 3d print, and fussing with my new smartphone. The game is a lot different since I've graduated college, and for the time-being, I really enjoy it! Anyways, I'll be sure to post that content along with the other life-updatey things I've been doing. I'd say I have about five posts of content, and I'll try to get them out on a soonish basis. :D

Saturday, August 29, 2015

Research and Implementation Strategies

In breaking down research of larger topics, I've found that it's been useful (for me) to place a higher emphasis on reading than swinging wildly at application. I'm sure anyone interested in Computer Science understands the sometimes overwhelming pressure to create and be 'deliverable', so much so that some discard reading altogether. However, I've found that by pacing myself and spending "loose time" reading, I'm further solidifying my understanding and setting myself up for success when it comes time to begin implementation.

Another I have chose to do this is I have a bad habit of picking up a lot of books when I'm in "The zone". I remember spending time in professors' offices at awe at the large collection of books and wondering how many they had read cover to cover, how many were gifts, how many are only reference, and etc. I want to do my best to make sure that any book on my shelf I've at least read through a couple of chapters in. It can be easy when you're concerned with output to be a bit on the impatient side with books, but the fact of the matter is that you're overlooking the opportunity to gain a better, passive understanding of the material at hand.

My present example would be my study of MP3 files. Amazing stuff really. A form of compression based human psychoacoustics. However, I wouldn't have been able to reap all the fascinating information I've learned so far if I hadn't spent the time throughout reading about it. Instead I'd just be staring down the frame header documentation, wondering what each component meant, and desperately googling for every answer. I say that, because that's where I was. Staring at each individual bit, unsure of what many of them were for... but the important part is that I encountered them casually in my reading, and coming back, the whole structure has come together for me. Now it's just a matter of doing more reading into encoding and decoding, and how I can go about that.

My big idea is to spend most of the week --when my dedicated programming time is sparse-- to reading, and then use part of my weekend block to execute a small, perhaps unrelated bit of programming. For example tomorrow I'll either be looking at a 6502 assembly application or coding through a neural network in C++. I suppose it's whatever I feel like!

I'll be sure to post more about what I've learned, I just thought this entry may be useful for those who want to learn but don't have a lot of consistent time on their hands! Let me know your study strategies as well.

Thursday, August 27, 2015

The CS bucket list

As you may have seen in "My Career and My Ambition, pt. 1",  I've really enjoyed the opportunity at my work to investigate things on a deep level, such as how encodings affect the size of data as well as what characters are supported. It's got me asking a lot of questions about what the data around every day really is, on a fundamental level. How many people, technologically/musically literate or not, understand how MP3 files are structured? I don't know the answer to that question, but I would like to be one of those who does understand. So I decided to create a list of small programs I could create to systematically acquire this kind of information, a sort of "CS bucket list" (mediocre title definite tentative). Here are some of the things I'd be interested in studying:

  • Raw MP3 processing
  • Raw image processing
  • QR code generation
  • Creating an Assembly script
  • Neural Network applications 
  • File Compression
  • Live sensing
 So, these kind of applications will be a lot of the content of my future posts-- and in no particular order. I've already got a foot in the door studying 6502 and other flavors of assembly through tutorials and TIS-100. This will just be something in my free time too, so don't expect any kind of schedule. I'll gradually update on my progress from time to time.

Sunday, June 21, 2015

Pedal build #1: "Lil' Buddy" dual footswitch [Boss FS-6 clone]

After a lot of prior planning, I've began work on my first pedal build! Of course I decided to go a bit easy this time, and build something that has a simple circuit and doesn't require a lot of signal processing. This also happens to be within the same window that I purchased an Boss RC-3 loop station, so I decided to build a dual footswitch much like Boss' fs-6 dual footswitch, because it's ugly and I can't bring myself to pay the price of a new video game release for something that doesn't actually change my guitar sound.

Everyone remember the 1980's?
Also pictured: several options you don't need (that you're paying for anyways)

Using a schematic I got from instructables, I purchased all the parts I need from Mammoth Electronics (custom painted to match the loop station I might add), and took it home this Father's day weekend to get the holes drilled (Mammoth provides several preset drillings for typical stompboxes, but my hole plan for my footswitch is admittedly a little far-fetched). We had a great time taking measurements and planting the holes, and this was the end result:


the next step is taking it home to get it wired, which could be messy. :)
Either way I'm sure it will turn out well. I'll be sure to update whenever it is in action.
Looking ahead I have plans of designing several completely original pedals, but I'm going to start with several kits: next up will be an analog reverb pedal ("Mammoth Cave"), a bass octaver ("Big Bomb") and a fuzz pedal ("Muppet Fuzz"). I have many interesting and creative ideas for these kits, including getting some local talent to make me some vinyl stickers to put atop the enclosure. After I have a body of work, I'll start doing some experiments with designing my own unique pedals, or perhaps yet-unknown replicas of well-known pedals. 


Wednesday, May 6, 2015

Electric Mortar Board featured on Adafruit's blog!


I'm happy to announce that the folks at Adafruit thought my mortar board was so cool, that they decided to share my recent video of the cap in action on their wearables blog. I'd like to thank them so much for their support and promotion. Here's the video that was featured in case you missed it:


Sunday, May 3, 2015

Electric Mortar Board Update:

As promised, here are some more up close shots of the circuit. It performed well at graduation despite the battery concerns. Many thought it was the best graduation cap there, and netted me a few cat calls from Naomi Judd, as well as compliments from the President and Registrar. As promised I will make a fritzing diagram and some code for github.


Side view of circuit.

More vertical view of circuit.

(attempt at) other side of circuit.

A bigger picture of the circuit.

Here's how it looks from the front with the lights disabled.

A close look at the safety pin job that held it in place.


Lastly, a video of the programmed sequence.


Here is the cap in action when I walked.
Angelic.

Saturday, May 2, 2015

Electric Mortar Board Finale!


So, after some initial ups and downs, I completed my full graduation outfit!
Here's a short video preview of the headwear:

What you see here is the full package: the mortar board modified with a LED sequence using Adafruit Neopixel and an Arduino Uno, a feathered tassel, aaand some sunglasses. While the last two are a bit more self-explanatory, let me explain how I made the cap possible-- I'll try to get some pictures of it tomorrow after the big rodeo... maybe even some of my college's footage, if I can find any.

While it's not exactly the best practices for a project like this I working under the pressure of only having a few hours in the lab, so I had to work quickly. The first and most important thing, which you may want to keep in mind with your own Neopixel adventures is the fact that the strand I got was actually wired in reverse. That is to say, the wires for input were actually on the output side. I read that this occasionally happens, but I thought I would mention it as it set me back for a while. Of course, you can always just read that one said says "digital in" or DI, and the other says "digital Out" or DO... 

Other than this, it should as (possibly) simple as wiring the digital in to a selected digital pin, the 5v to 5v and the ground to ground. Next comes the programming!

Working with neopixel is a great way to experience iteration in a very 'real' environment! I see this because of course your code will be driven make the lights change. Luckily, if you're working with the Adafruit modded Arduino 1.6 install, the Neopixel library will be right there to use, which, while it does not contain many useful example codes, has some great built in functions for making your own sequences, namely setPixelColor(), show(), and clear(). Using all three of these, along with the numberOfPixels() qualifier should be all you need to right successful iterating sequences! While I will make the ones I made available on github after graduation, I implore you to write your own functions, because, even if they go wrong, you might produce something awesome! For example, I accidentally fed in a uint16_t instead of a uint32_t for a color, and instead of white, it was this eery blue. If you do something too far fetched, the sequence just won't occur, so there's nothing to worry about! Start simple, and get more complex. Play around with delay speeds, the size of the pixels you work with and what colors you change them too, and you're guaranteed to have a great time! I look forward to applying neopixel to more things, like my instruments.

For powering the arduino, I got some 9v adapter wires and fed them into one of the dc adapters that goes into the arduino. I modified the circuit to include an on/off switch for when I don't feel like parading my funk. I've been told that 9vs are really efficient, but for the scope of this particular project it was beneficial in that it took up much less space, and complimented the parts I had on hand. I would have rather used my flora, but I didnt have any batteries to satisfy the pinout, so I ended up using just an Arduino Uno. Thankfully I don't think my audience will be too critical.

As I mentioned once I get some free time I'll upload my functions to github, as well as a fritzing diagram. Thanks for all your support! I look forward to graduating tomorrow.


Thursday, April 30, 2015

Pi Cluster presentation

Yesterday I had the pleasure of presenting Doopliss to my peers at my networking final. I successfully set up all three nodes and had it read through large english novels, counting word occurrences. It occurred to me that I should refine my master image a bit, and then upload it to github so anyone wanting to construct a cluster like this one can hit the ground running! Maybe I'll introduce some aliases as well, as mentioned in the report. In the mean time, enjoy some pictures from the show!


You'll be happy to know I had Parliament blasting out of my laptop the whole time I was giving presentations. My corner of the lab was obviously the most happening one!


Monday, April 27, 2015

Pi Cluster Report

Here is a direct paste of my report, and a link to the file.

Build a Raspberry Pi Hadoop Cluster
in Record Breaking Time!
a tutorial by Jacob Leibeck


For my Computer Networking project, as opposed to doing something web-based, I chose to research constructing a Hadoop computing cluster using the Raspberry Pi, an affordable linux-based embedded system. Hadoop is a service that allows you to run distributed Java programs that call on the connected nodes to break down a larger task to several much smaller ones, for each individual node to process and eventually return. It’s a fun task that puts your Unix skills and networking knowledge to the test. I had quite a great time building it, and I hope you do too!


What you’ll need:


For the input:
  • A compatible monitor
  • A USB keyboard


For the Nodes:
  • A few Raspberry Pis
    • USB to Micro-USB cables
    • USB wall adapters rated at ~1A (1000 mA)
    • Compliant micro-SD cards (I recommend 4GB)
    • Short ethernet cables


For connectivity:
  • A networking switch
  • A power strip


Creating the Master Image


The first step of this process will be creating our master node, as well as the image from which we will create all of our slave nodes. That being said, any changes you make on your master node will reflected across all the nodes. Furthermore, after you have your master node optimized, it becomes a matter of just copying the image on to the rest of the machines, and making a few small changes.


For the master image I recommend going with a 4GB SD. This is more cost-efficient and grants you the ability to write on any larger SD (due to filesystem expansion, you cannot go down in size). If you are purchasing several cards, consider buying from the same brand, as you may find that even with two brands of the same amount of storage, that they may actually contain different amounts of free sectors. For example, I created my master on an 8GB Sandisk card, but could not write that image to my 8GB PNY SD due to size limitations.


For the initial image, you will need to download a distribution of Raspbian from the Raspberry Pi website. Raspbian is basically a Pi-optimized version of Debian, which is in turn compliant with Hadoop. For writing images I suggest using win32diskimager, a simple no-hassle program for read and writing images onto machines.


After your master node is ready to go, go ahead and boot up the Pi into the monitor with a keyboard ready. Here’s a few housekeeping tasks you’ll need to cover in raspi-config before we get started with Hadoop:
  • Expand SD card
  • Set a password (make it simple, you’ll be using it a lotttttt)
  • Choose console login
  • Choose keyboard layout and internationalization options
  • Overclock (optional)
  • Change hostname to node1
  • Change the memory split 16mb
  • Enable ssh


go ahead and use sudo reboot to reboot. If you ever make any more-than-minor changes to the Pi, your best bet is to reboot and make sure these changes have taken place.


Next, you’ll want to check that you have a java distribution on the Pi. If you downloaded the most recent one from the Raspberry Pi site, you should be fine, but just in case, go ahead and check with java -version.


Next we’re going to set up a hadoop user for each node. Here’s some commands to get the account set up:


sudo addgroup hadoop
sudo adduser --ingroup hadoop hduser
sudo adduser hduser sudo


highlighted are the group we’ve created, along with the account.


Next we’ll need to configure ssh keys, so that our nodes can communicate to each other without passwords. Here are some more commands to get you started:


su hduser
mkdir ~/.ssh
ssh-keygen -t rsa -P “”
cat ~/.ssh/id_rsa.pub > ~/authorized_keys


Now let’s make sure that we can access the new user, and that ssh is configured properly by using su hduser followed by ssh localhost. If all is well you should be in a “connected” to yourself.


Configuring Hadoop


Go ahead and hook up your Pi to an existing internet-enabled network. The easiest method is probably a direct ethernet connection the router. If at any point you’re concerned with the Pi’s connectivity, you can check with ifconfig.


Once connected to the internet, go ahead and grab a distribution of hadoop and install with the following:
wget http://apache.mirrors.spacedump.net/hadoop/core/hadoop-1.2.1/hadoop-1.2.1.tar.gz
sudo mkdir /opt
sudo tar -xvzf hadoop-1.2.1.tar.gz -C /opt/
cd /opt
sudo mv hadoop-1.2.1 hadoop
sudo chown -R hduser:hadoop hadoop


This is the last time we’ll need to use the internet, so you may disconnect. At this point, you should give the Pi a static IP, so that within the context of the switch, it will always be the same. Do that by editing /etc/network/interfaces to reflect the following changes:


iface eth0 inet static
address <your IP of choice>
netmask 255.255.255.0
gateway: <gateway of choice>


Be sure to make it a valid IP you can remember, because you’ll be using it and the adjacent ones when you connect the Pi’s to the switch. You may consider rebooting your Pi at this point.


Back in the land of Hadoop, we’ll need to configure some environment variables. In /etc/bash.bashrc or in hduser’s ~/.bashrc add the following lines:


export JAVA_HOME=$(readlink -f /usr/bin/java | sed "s:bin/java::")
export HADOOP_INSTALL=/opt/hadoop
export PATH=$PATH:$HADOOP_INSTALL/bin

Now, to test our hadoop path, run hadoop version somewhere outside of the /opt/hadoop/bin folder.


In /opt/hadoop/conf/hadoop-env.sh, uncomment and change the following lines:


# The java implementation to use. Required.
export JAVA_HOME=$(readlink -f /usr/bin/java | sed "s:bin/java::")


# The maximum amount of heap to use, in MB. Default is 1000.
export HADOOP_HEAPSIZE=250


# Command specific options appended to HADOOP_OPTS when specified
export HADOOP_DATANODE_OPTS="-Dcom.sun.management.jmxremote $HADOOP_DATANODE_OPTSi -client"


In /opt/hadoop/conf edit the following xml files to reflect the following:


core-site.xml


<configuration>
 <property>
   <name>hadoop.tmp.dir</name>
   <value>/hdfs/tmp</value>
 </property>
 <property>
   <name>fs.default.name</name>
   <value>hdfs://localhost:54310</value>
 </property>
</configuration>


mapred-site.xml


<configuration>
 <property>
   <name>mapred.job.tracker</name>
   <value>localhost:54311</value>
 </property>
</configuration>
hdfs-site.xml


<configuration>
 <property>
   <name>dfs.replication</name>
   <value>1</value>
 </property>
</configuration>

Now, we will need to create a temporary file system for Hadoop to work with, so that it can pass files between the nodes:
sudo mkdir -p /hdfs/tmp
sudo chown hduser:hadoop /hdfs/tmp
sudo chmod 750 /hdfs/tmp
hadoop namenode -format

Running your first Hadoop program


To check that you have properly configured all your Hadoop install correctly we will run a sample single-node program, that counts the words in the Hadoop license agreement. It’s not glamorous, but it’s just a few steps away from having a true pi cluster.


As hduser, start the following two processes:


/opt/hadoop/bin/start-dfs.sh
/opt/hadoop/bin/start-mapred.sh


Now you can check that all of the proper services have started with the jps command. These are all session related things, so numbers will vary, but you should see things like Jobtracker, Jps, NameNode, SecondaryNameNode, TaskTracker and DataNode. Even if you don’t see all of them, feel free to try to run the program in the case that they’re not needed.


Before we can compute, we need to migrate the license agreement into the Hadoop file system using
hadoop dfs -copyFromLocal /opt/hadoop/LICENSE.txt /license.txt


Now we enter the following command to begin the program, creating an output file in the Hadoop file system. This may take a little while to run.


hadoop jar /opt/hadoop/hadoop-examples-1.2.1.jar wordcount /license.txt /license-out.txt


Last, import the output to the local filesystem:
hadoop dfs -copyToLocal /license-out.txt ~/


You can now poke around in this directory to see the results of the computation. The file part-r-00000 should be the proper results of the word count.


Finally to remove any files you’ve added to the HDFS system, run the following command:
rm-rf /hdfs/tmp/*


Setting up the Network settings for the Nodes


By now you should hopefully know how many Pi’s you want to use. Even if not, you may add extra nodes, that your Hadoop sessions will (hopefully) realize are not in use.


In etc/hosts you can go ahead and create a DNS-like association that matches up the other nodes with IPs. Here is what mine looked like:


<your ip+0>  node1
<your ip+1> node2
<your ip+2> node3
And so on. In Hadoop we can go ahead and distinguish node1 as the master, and the others as slaves. This can be accomplished by placing node1 in /opt/hadoop/conf/masters, and in /opt/hadoop/conf/slaves add all of the nodes to make them part of the cluster.


Now go back to some of the XML files we edited earlier and make a few changes:


core-site.xml


<configuration>
 <property>
   <name>hadoop.tmp.dir</name>
   <value>/hdfs/tmp</value>
 </property>
 <property>
   <name>fs.default.name</name>
   <value>hdfs://node1:54310</value>
 </property>
</configuration>


mapred-site.xml


<configuration>
 <property>
   <name>mapred.job.tracker</name>
   <value>node1:54311</value>
 </property>
</configuration>


Cloning the Node:


(This doesn’t require a terrible amount of attention and can easily be completed at your leisure)


With that last change, we are now ready to clone the master image! Do this by inserting your SD in your computer win32diskimager, writing in a directory and filename (<something>.img) and pressing read for the proper drive. Hold on to this image, as it will be needed for every other node.


Once it has been made, start writing the image to all of your other SDs.


Building the setup:


Now begins the part where we construct the cluster! Connect all of your Pis to the switch using ethernet cables. Now add power to all the Pis and boot them up. This can be quite messy, so I suggest embracing some kind of layout like the following:
:
All you should have to do is change the hostname and IP address on each of the new nodes.


Back in node1, go ahead and attempt to ssh into each of the nodes. You should be able to do this will of the settings we made, but strange hardware failures can still happen! Remember that you can also ping everyone. If you were able to connect to everyone without a password, you are ready to run a distributed program! Step back to the wordcount example, or look up other Hadoop example programs. Congratulations on your massively-computing mass of wires!


Optimization and User Friendliness:


You may have felt like a technician running all of these hardcore hadoop commands. In order to make the process simpler, you may consider creating aliases to simplify commands or cut multiple commands to one. For instance, by combining the all of the wordcount lines and creating a singular file in the HDFS filesystem, you could simplify the wordcount program to just be
wordcount <input_file>


Same goes with contacting and networking with the other Pis. You can write one command that pings every node to check the status, or maybe even changes all of the IPs, if you’d like to conform to a network. This is only the beginning of an amazing Hadoop adventure, so spend time customizing your image to make it the best it can be!


Sources and Contributions:


To my build my cluster I followed this tutorial:


To read about my own misadventures in building the cluster, check out my blog:


Thanks to Dr. Scott Heggen for the great Networking class, and Dr. Matt Jadud for his support in helping me construct the cluster.

Thanks also to NCAR for the privilege to work with their laboratory constructing Pi clusters, and I’m very sorry I couldn’t join you this summer!