Showing posts with label ROS. Show all posts

Saturday, December 27, 2014

Drone Following Project #15: ROS development

I uploaded an early, early version of the ROS package that listens to the device and sends the info to the Drone. You'll notice that the first executable is called 'button_launch'. That's because the first part I want to work with is sending the Drone to TakeOff mode and Landing mode simply from pressing the Arduino button. The full executable will likely look similar though, as this functionality is also included in the full scope of the project. As you can see the use of the new bool message ('/Lakitu/Device/NewState') has helped organize things greatly. I still feel that I can cut down the amount of times State is subscribed to with some clever implementation, but I'm a bit tired for it now. My pseudocode stab is:

...
NCallback(Bool msg){
 ...
 ...
 ...
  r_nustate=msg->data;
}

SCallback(UInt8 msg){
  r_state=msg->data;
}

Subscribe('NewState',1000, NCallback);
if (r_nustate ==true){
   Subscribe('State',1000, SCallback);


switch(r_state):
...


This way we only call on that extra subscriber when we need it, and rely on global memory otherwise. I have kind of PTSD from being really careful about the memory from working the Velodyne HDL-32E, since I was having to transfer a lot of pics and clouds at the same time.

 Once this is all hashed out, I'll begin testing using the special String publisher I made, then maybe the Drone's LEDs, and then finally the Drone actually taking off and landing. You can never be too careful when playing with the Drone indoors, or for an extended amount of time. Then it's on to the glorious world of IMUs.


On the topic of Velodyne, I'll be making my Velodyne code available on Github slowly. It will be a private repo, and it may take a while because I want to document it really well. I'll make an update when it becomes available.

Friday, December 26, 2014

Drone Following Project #14: Updated Arduino sketch

I'm feeling better, so I went ahead and fulfilled all of my improvements for modifying the Arduino sketch, along with some new features. Here's a quick overview of the new features:
  • Two publishers (Uint8 for state, and Bool for new state)
  • Consistent "/Lakitu/Device" name scheme
  • 3 LEDs (blue, yellow, green)
  • 4 states (Landing, DronePosition, Takeoff, Calibration)
The two publishers were already explained, but why did I add a whole new state? Well, again, I was thinking ahead at the steps that need to be taken when GPS is implemented. We've taken it for granted so far that the Drone is going to translate its position from the device, however, I failed to addressed how the Drone would receive its initial distance from where the device will be. There are a few sensing and distance ways to go about this, but I worry that many of them limit the set of scenarios greatly. I currently have it in mind that you will be able to press a button to generate a GPS location for the Drone that will change as the Drone moves. Whether this method is successful or not, I feel that it's good to secure a state where the user can can safely move around and find the initial distance from the drone without the danger of it moving.

Anyways, you can can see the changes made on Github. Enjoy!

Tuesday, December 16, 2014

Drone Following Project #12: ROS and ardrone_tutorials

Today, during my lunch break I connected my Drone to ROS and gave it a whirl. This made signficantly easier by MikeHamer's ardrone_tutorials repo. In fact, I'd say that this is a great fit for any hobbyist, besides the fact that you have to set up and configure ROS in Linux (though I heard thay make preset virtual machines for this).

Whereas I'm using to breaking my neck attempting to connect to the Velodyne or other ethernet based utilities, connecting to the Drone was a synch. Perhaps this is due to the fact that it has own wi-fi connection, and you don't have to fool with all of that other garbage. Anyways, I managed to quickly get outdoor_controls.launch working. It pops up a handy camera feed GUI, and from this point you can use WASD style controls to steer the drone in all directions. More importantly, we can use rostopic to navigate the many, many topics that the ardrone_driver node produces... Thankfully, it is fairly well organized. There is a direct nav topic, IMU topic, a set for each camera, and even one for an emergency reset. I suggest you peruse ardrone_autonomy's readme for more info-- it is really well written. Below you can see some of my screenshots from my flights, along with the data produced.


Sorry for no IRL pictures of the drone in action. I'm sure we'll get enough of that later. Now on to deciphering those topics, and learning to put them in code!

Monday, December 15, 2014

Drone Following Project #11: Project Name!

This is a stupid and insignificant detail, but I've finally realized what to call this project! I originally had it under a Repo known as "AirCat", an obvious play on "AirDog", but I've found something much better.

Do you remember Super Mario 64?

Even if you don't, perhaps you recognize this character:


This is Lakitu. He got his start throwing spined turtles ("Spinies") at Mario in the original Super Mario Bros., but as time went on Nintendo chose to give him a more friendly role in future titles, such as an assistant in Paper Mario, the flagger in Mario Kart, and most importantly, the cameraman in Super Mario 64.
His significance as the cameraman was a pretty unique one at the time. While there may be an existing exception, not many thought to actually characterize the camera in a video game before, and most treated it as simply a mechanic. In Super Mario 64, Lakitu is actually the first character shown in the game world, flying down as Mario heads to the castle, and taking the place as his cameraman. From this point on, the player controls not only Mario in saving Princess Peach, but as Lakitu as well, helping properly angle the camera so that the player can more easily see what is around them. Today, I had the realization that this is not unlike the intended result of this project. Therefore I choose to name the project Lakitu. 
If I complete it in a timely manner, I'll be sure to make my own Super Mario 64 video as a demonstration. Hopefully I can attract the gaming community to this project and get the word out. It's good to balance yourself as engineer by surrounding yourself with clever and imaginative people. It could mean inspiration for your next part of the project! I foresee the implementation of Oculus Rift being a popular topic of discussion.


Bonus asset:


Sunday, December 14, 2014

Drone Following #10: Added ROS capabilities to sketch

Tonight I added ROS functionality to Arduino sketch. It's just a few lines of code, but they have great implications! The LED state machine is now a Publisher and sends its information via the serial port, so now anything connected to ROS on my laptop can read what state the device is in. Logically, the next step is to start working with the Drone. Here are some screenshots from it in action:


As you can see, rosserial got a little upset at my procedure... and I'm not sure why. All 3 states still work in action, but I get lots of mean text as opposed to the approval you get from other message types. A lot of threads seem to indicate this is due to the relative message size and buffer size for the particular board, but I seem to be well within the limits of my ATMEGA32 board. I'm investigating it currently, but as it works, I'll also be moving on to something a lot more exciting.


Tuesday, December 2, 2014

Drone Following #7: At last, a sensor

Good news, everyone! I finally managed to get my hands on an IMU. I know it's been a while, but also, I think the professor that was going to supply me with one gave up. Luckily, I managed to pick one up from Sparkfun's great Cyber Monday sale. Not only am I surprised that anyone had a Cyber Monday sale, but also, that they were selling decent goods at decent prices. I picked up a 9DOF IMU (LSM9DS0) normally valued at $30.00 for just $15.00.

I'm glad that it's on it's way, because it means I can continue work on this exciting project. However, there will also be a lot of configuring and reading to do. This presents a good opportunity to learn more in-depth about IMUs, Gyroscopes, Accelerometers, and Magnetometers. I may do a write up on Camera Eye about what all I've learned, so I can share it with other people. If you'd like to investigate more about this chip yourself, Sparkfun has a guide here

Anyways, as it stands, I'm currently wrestling with my last week of classes and finals, but I will be spending my winter break taking on projects like this one, and some other ones I have with friends, so stay posted!

P.S. Here's a video using the same chip for controlling a camera.


Thursday, September 18, 2014

Drone Following #6: Buying the right sensor

I'm having a hard time choosing which sensor to buy for the Drone following project. It's just as much as a mathematical question as it is a computational one. Let me put it to you this way, an Accelerometer is associated with acceleration, and a Gyrometer is associated with velocity. If you understand the calculus relationships there, you can interpolate "the next integral up" (velocity from acceleration, position from velocity, etc.), but it comes with a fair amount of error.

What we need from this project is a way to detect a change in rotation from the person, as well as a change on the two dimensional plane. This could be done by mapping the person's theoretical position, but again, even with the velocity and acceleration information, it can get kind of scary. Thankfully, the angular velocity of the person rotating can easily be extracted with a gyrometer, but that leaves the more difficult question... what about movement?

An important thing to consider is also how you plan to implement the system. You could do it with a position-tracking system, or you could "take things down a notch" and think in terms of velocity. I chose the latter, after thinking back to my teleoperation node for the Pioneer. Everything you see the joystick doing is actually "telling" the robot to change it's velocity in one direction (with some scaling). That being said, I think the same could be done for this project. ROS communicates messages quick enough that, as long as things didn't get dicey, the Drone could follow the person's velocity, or at least I think.

This kind of ambiguity doesn't leave me in a good place to buy some equipment. Thankfully, since the consummation of my project and my Electronics course's project has finally occurred, I can lean on the department to buy a nice sensor (that they will own for other student projects hereafter) at no risk or expense to me. Therefore we went with a complex 9 DOF stick from sparkfun. After all, you can just ignore the aspects you don't need until you get to that point. And who knows, maybe if this goes well, this chip could be the kind of thing we'd want for the head tracking, and then maybe just a simple one-axis gyro on the back.

I imagine it'll be a little bit before it gets here, so I'll spend more quality time with my Drone. It'd be a blast to get it configured with ROS!


Drone Following #5: Getting ROS onto the Arduino.

Sorry for no updates in a while. If you haven't heard, I founded a robotics club, and I have a Differential Equations exam this week.

However, in my electronics course, I had some success uploading ROS onto the Arduino, which is certainly a step forward. I expected it to be a lot more difficult than it actually was, but their were a few tricky elements. I find that the stage of just getting everything installed is FAR more frustrating than actually programming and compiling.

The most confusing thing, which I'll be sure to specify here, is that, in Ubuntu, the Arduino's 'libraries' and 'tools' directories are not in the sketchbook directory like every other OS I can think of. It is instead in
/usr/share/arduino
 so don't let that trip you up if you want to add anything to your IDE.

With that out of the way, it's time to set sail for rosserial. Here you'll find a great set of tutorials as well as a good video explanation of why you would want to use ROS on an Arduino project:


In short, it's one of those many "reinventing the wheel" moments that comes as part of being a programmer. Also, if ROS supports whatever else you're working with, just think of ROS as the dinner party both of these members will attend. Now, I have a means of making the Drone communicate with the Arduino, my "sensor stick".

After getting through the installation bores, you can check the first tutorial, a sample publisher. You should find that it's pretty easy. When you finish you should have a new topic, "chatter", that contains a "Hello World" message from the Arduino!


This may not be impressive in itself, but imagine if we modified this a little bit. Imagine a theoretical sensor running from the arduino and writing that data to ROS. You now have valuable, instant information at your fingertips. So now it's time to get the Drone talking and order a sensor. I'll make a separate post about that arduous process.


Thursday, August 28, 2014

Drone Following #3: Collaboration and Ideas

Haven't done much flying since the last post but quite a bit of logistical thinking-- both alone and with others. I have two friends interested in working on this project with me-- my girlfriend, Nicole Lay, a Computer Science graduate, and my friend, Aaron Bradshaw, an engineering student at University of Kentucky. You may have noticed the yet unfulfilled "AJ Labs" link over at leibeck.tk, and that's what we intend to put there. It's really touch and go while we figure out how we want to share our information, so for the time being just know they are contributing from close or afar.

In terms of the project, I've tried to make it into a basic logistics problem. What kind of information are we receiving, what information can we derive from this existing information, and how can we use this connectivity to achieve our goal. So let's do it this way:

The Problem: We want to be able to have the drone follow targets during a variety of activities.

Current Thoughts: Connecting the drone to another "theoretical" device in order to orient the drone towards the device, and to follow it.

Available Information: On the ardrone_automony github page, you can see a concise list of the accessible information:


  • header: ROS message header
  • batteryPercent: The remaining charge of the drone's battery (%)
  • state: The Drone's current state: * 0: Unknown * 1: Inited * 2: Landed * 3,7: Flying * 4: Hovering * 5: Test (?) * 6: Taking off * 8: Landing * 9: Looping (?)
  • rotX: Left/right tilt in degrees (rotation about the X axis)
  • rotY: Forward/backward tilt in degrees (rotation about the Y axis)
  • rotZ: Orientation in degrees (rotation about the Z axis)
  • magXmagYmagZ: Magnetometer readings (AR-Drone 2.0 Only) (TBA: Convention)
  • pressure: Pressure sensed by Drone's barometer (AR-Drone 2.0 Only) (Pa)
  • temp : Temperature sensed by Drone's sensor (AR-Drone 2.0 Only) (TBA: Unit)
  • wind_speed: Estimated wind speed (AR-Drone 2.0 Only) (TBA: Unit)
  • wind_angle: Estimated wind angle (AR-Drone 2.0 Only) (TBA: Unit)
  • wind_comp_angle: Estimated wind angle compensation (AR-Drone 2.0 Only) (TBA: Unit)
  • altd: Estimated altitude (mm)
  • motor1..4: Motor PWM values
  • vxvyvz: Linear velocity (mm/s) [TBA: Convention]
  • axayaz: Linear acceleration (g) [TBA: Convention]
  • tm: Timestamp of the data returned by the Drone returned as number of micro-seconds passed since Drone's boot-up.

  • Derivation and Communication: Of particular interest for my idea is the rotz parameter. If our "theoretical device" could have a similar parameter, but with certainty, we could line up the two devices on similar plane, and have the drone maintain a 180 degree relationship, facing the device at all times. And as long as the device maintained the ability to be moved relatively, this transformation could be applied to the drone. As you can see, most of this relies on a communication and transformation from the external device.

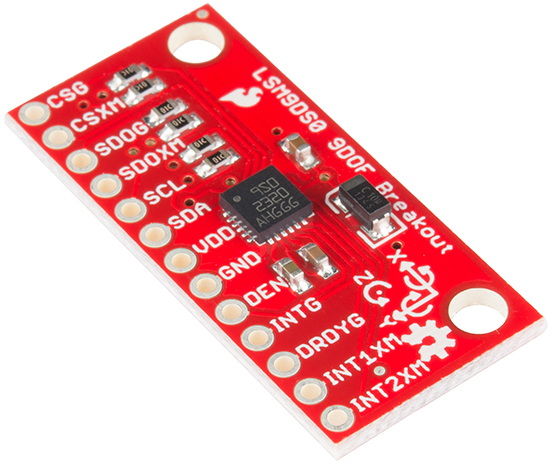
    The Device: We're also putting a lot of emphasis on what the particular device could be. For the sake of my upcoming project for electronics course about microcontrollers, I may consider using an Arduino with a GPS shield, if that is indeed a possibility. It could expand to mobile devices like phones and tablets, but getting an app and setting it up to communicate with ROS could be even more difficult. We'll see, I suppose. I still need to try my luck at controlling the drone with ROS.

    A side note: It would seem intuitive to purchase a GPS flight recorder for the drone, and maybe give it a better idea of where it is relative to its surroundings, but I feel like this would be "buying" my way out of the situation. I understand that we're talking about a drone and other device, likely bring the cost up past 300-400$, but it's really important to me as an aspiring Engineer to make the most of what's available, not only for the challenge, but to make to make the end result available to the largest group of users. In truth there are already systems that extreme sports athletes use, but I would like expand this type of system to this cheaper platform. That's what it's all about!

    We'll see where this idea takes us. I may not update for a while, but I'll be sure to include my flight videos when I can.

    ------------------------------------------------------------------------------------------------------------